Monday, December 29, 2014

Gluten-Free Maconut Cake


              So this may sound like an odd name for a dessert but what else could you call a cake made up of Macadamia nuts, Chocolate, and hazelnut? Maybe a little slice of heaven! I hope you enjoy this yummy treat topped with my own version of nutella frosting!    

You'll need:


2 cups sugar

1 tbsp vanilla extract


4 eggs


1 ½ tsp xanthan gum

1 tsp baking powder

1 tsp baking soda

1 tsp salt

1 cup buttermilk

1 1/4 cup Salted Macadamia Nuts, Chopped

½ cup Cacao Nibs

       Preheat the oven to 350°F.  Prepare two round 9” pans by greasing and flouring with gluten-free flour.

      In a medium bowl using an electric mixer, cream the coconut oil and sugar until light and fluffy.  Add in the extracts then continue whipping until fully creamed.

       Gradually add the eggs in one at a time, mixing well between each addition.

       In a separate bowl, combine the dry ingredients.  Then stir into the creamed mixture a little at a time, alternating with the buttermilk.  
 Fold in Macadamia Nuts and Cacao nibs.  Mix in thoroughly.
       Pour batter into prepared pans, then bake for 25 - 30 minutes or until a toothpick comes out clean from the center and the tops are a light golden brown.  Allow to cool completely before frosting.

 Chocolate Hazelnut "Nutella" Frosting

3 cups powdered sugar

¼ cup dark cocoa


1 tsp vanilla extract

 Heavy whipping cream, as needed

       In a large bowl, whip the butter with an electric mixer until fluffy.  Next, whip in one cup of powdered sugar, then add in the cocoa, flavorings and one tablespoon heavy cream.  Keep whipping until the mixture becomes a little thinner.  Then whip in the remaining two cups of powdered sugar one at a time, beating well between each addition and alternating with additional heavy cream as needed. 

       Spread the frosting over the first layer of cake to create a filling, then place the second cake on top.  and Finish frosting the top and sides of the cake with the remaining frosting.  Then serve and enjoy the nutty, chocolaty goodness! 

Friday, December 26, 2014

Amaretto Cheesecake


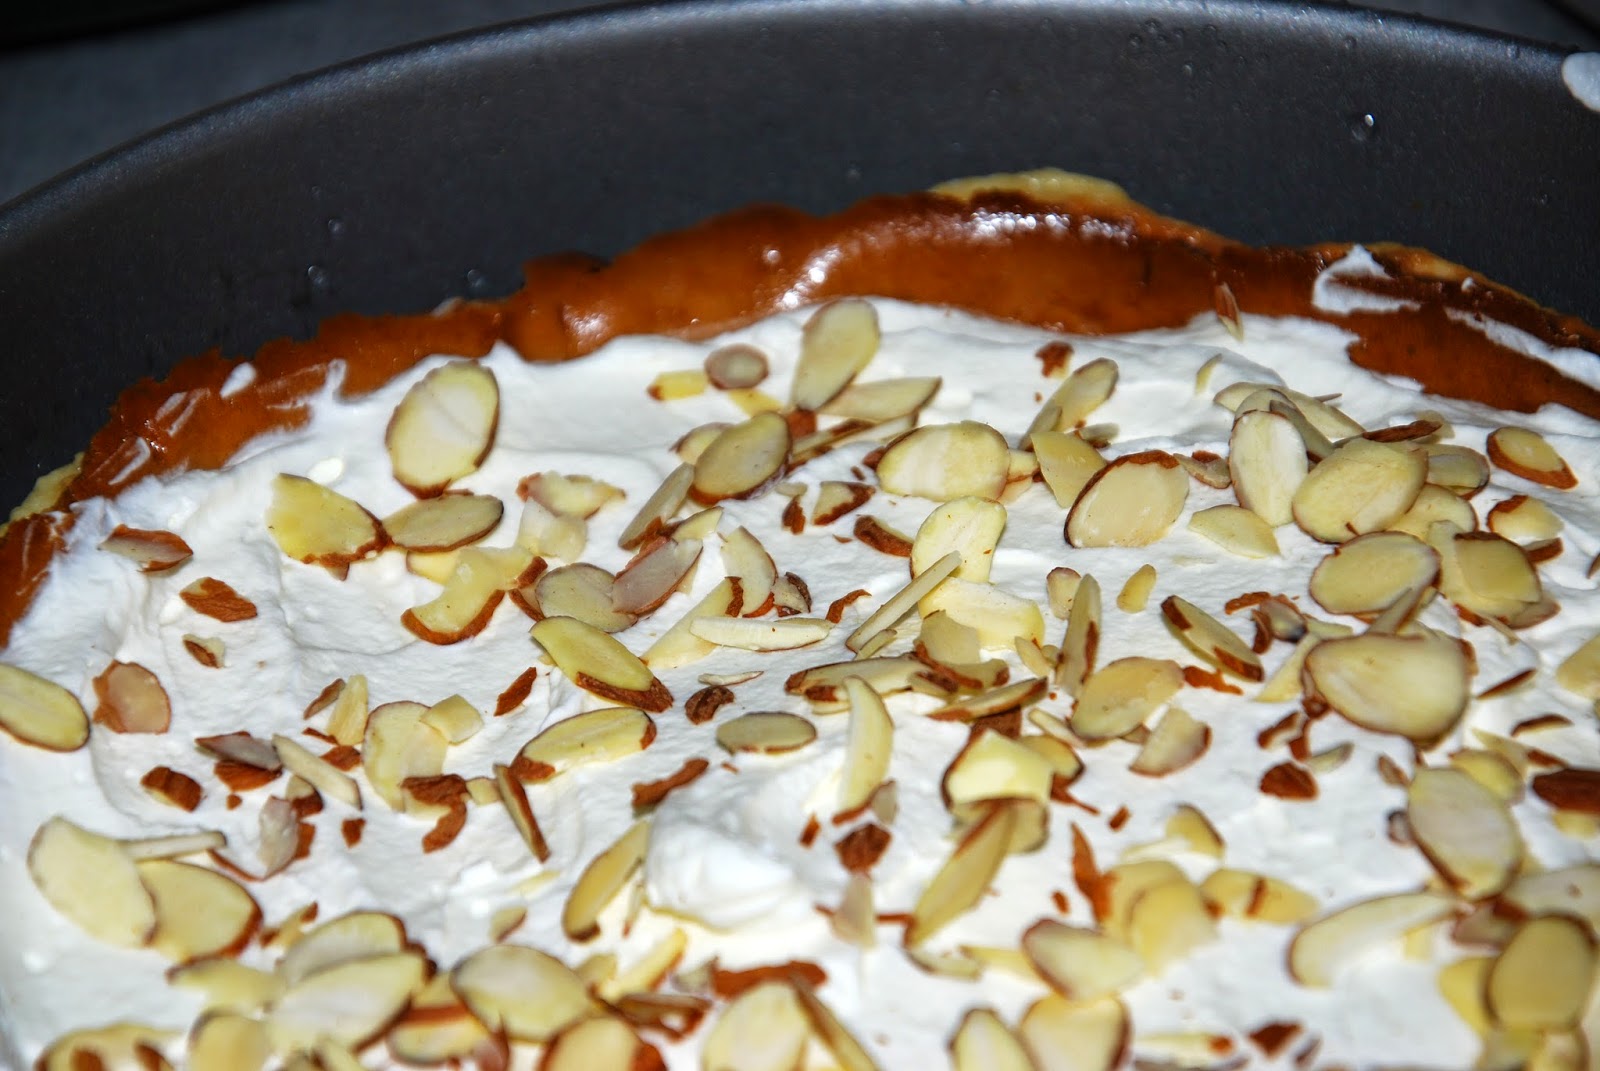
       One of my favorite flavors of all time is the savory-sweet taste of amaretto. So this week I decided to make an Amaretto cheesecake with a sliced almond whipped topping.  I hope you enjoy!
You’ll need...
 
Crust:
2 tbsp Sugar
5 tbsp Butter, softened 
You can either crush the cookies by hand in a small bowl, pulse a few times in a food processor, or put them in a nut grinder, which is the method I used.  I broke the cookies in half then ground them on the 'fine' setting of my nut grinder.  Whichever method you choose, you will need to use all of the cookies from the package.

       In a bowl, combine cookie crumbs, sugar, and softened butter.  Stir until the mixture starts to hold together.  Press into the bottom of a greased 9" spring form pan and set aside until needed.


Cheesecake:


1 1/3 Cups Sugar

1/2 tsp Salt

2 tsp Vanilla


4 Eggs

2/3 Cup Sour Cream

2/3 Cup Heavy Whipping Cream

       Preheat oven to 325°F.
       Using an electric mixer on medium speed, mix the cream cheese together, one block at a time until smooth, soft, and creamy. 
       Beat in sugar, extracts, and salt, mixing well to be sure all the ingredients are completely incorporated.  Next, whip in the eggs one at a time, beating well between each addition.

       After the eggs are mixed in, beat in both the sour cream and heavy cream until smooth.  Scrape down the sides and bottom of the bowl with a silicone spatula then whip the ingredients again to make sure everything is blended and there are no more chunks of cream cheese.

       Pour the mixture into the prepared spring form pan and place the pan on a round cookie sheet (just in case you have any spillage!).  Put it into the oven and bake for 1 hour and 15 minutes.  Once the cheesecake has finished baking, allow it to rest in the oven for another hour with the oven door shut.  
       After that, take it out of the oven and place it on a hot pad.  Put it in the fridge so it can finish cooling.

       While you’re waiting for the cheesecake to cool, you can make the topping.
 

Almond Whipped Topping

1 Cup Heavy Whipping Cream

2 Tsp Vanilla Extract

2 tsp Almond Extract


      In a chilled metal bowl, whip the heavy cream until stiff peaks form.  Whip in flavorings and continue to mix for several minutes.  Spread topping over the cooled Cheesecake and sprinkle sliced almonds across the top.  Now it’s time to cut, serve, and ENJOY!

Tuesday, December 23, 2014

Gluten-Free Caramel Macchiato Cupcakes


       So if you might have noticed from our most recent posts that there is a theme of some sort going on here.  Call me silly or brilliant, either one is fine.  ;) But I came up with the idea of taking some amazing hot beverages and turning them into some amazing baked goods.  In our last post, we showed how to create a hot cocoa inspired gluten-free and vegan cupcake.  Today I bring you my version of a Starbucks Caramel Macchiato, in cupcake form.  I hope you enjoy! 

You'll need:


1 cup sugar

1 tbsp vanilla extract


2 eggs


1 ½ Tsp xanthan gum

1/2 tsp baking powder

½ tsp baking soda

1/2 tsp salt

1/2 cup buttermilk

Makes 6 Jumbo Muffins

       Preheat the oven to 350°F.  Grease a jumbo muffin tin and set aside till needed.

        In a medium bowl using an electric mixer, cream the butter until light and fluffy.  Add in the sugar and extracts then continue whipping until creamed.

       Gradually add the eggs in, one by one.  Mix well between each addition.

       In a separate bowl, combine the dry ingredients.  Then stir that into the creamed mixture a little at a time, alternating with the milk.

       Pour batter into lined muffin tins, filling them about 3/4 full.  Bake for 20 - 25 minutes or until toothpick comes out clean from the center and the tops are a light golden brown.
       Allow to cool in the muffin tin for five minutes before transferring them to a cooling rack. 

       Once your cupcakes have cooled, it’s time to core out the center.  Don't worry, with the proper tool this task is much easier than you might think!  If you don’t have a coring tool then I would suggest using a butter knife to cut out a circle about the size of a quarter in the center of the cupcake, going down about 1 1/2" deep. 

Macchiato Butter Cream

1 cup butter, softened

3 cups powdered sugar

1/4 cup heavy cream

2 tsp instant espresso (I used one Starbucks Via pack)

1 tsp vanilla extract


       In a medium bowl, cream the butter until light and fluffy.  Next, add in one cup powdered sugar.  Dissolve espresso into the heavy cream then whip it into the frosting mixture.  Add in a second cup of sugar followed by the vanilla and caramel, then whip in the last cup of sugar.  Continue whipping until everything is fully combined and your icing is smooth and creamy.

       Scoop the frosting into an icing bag fitted with a large tip or fill a gallon-sized Ziploc bag, then cut one of the corners.  Pipe the butter cream into the center of a cupcake until the core is filled, then continue and frost the top of the cupcake as well.  Repeat this process until you’ve filled and iced all of the cupcakes.
 

       Serve and enjoy!  Preferably with a nice cup of hot coffee. 

Sunday, December 21, 2014

Vegan Gluten-Free Hot Chocolate Cupcakes


    Sooo, the post this week is a bit late...but...there is a good reason for it!  My editor and I have been super busy the past few days, working on creating our first episode of Delectably Different In the Kitchen!  We had a blast filming today and are so excited to have a big video launch in the New Year.  Stay tuned for that post!   

  For this week, I decide to continue with the theme of hot holiday drinks transformed into yummy desserts.  Today's drink is: Hot Chocolate!  In the form of a delicious vegan and gluten-free cupcake, topped with (what else?) Marshmallow Fluff.  Oh yeah, that's right.  I hope you enjoy!      

You'll need:

1 cup sugar

1/2 cup brown sugar


1 cup cocoa powder

1 ½ tsp baking powder

1 ½  tsp baking soda

1 tsp salt

1/2 cup coconut oil

½ cup pumpkin puree


1 tbsp vinegar

1 tbsp vanilla extract


1 cup hot water

       Preheat the oven to 350°F.  Grease two jumbo muffin pans and set aside.

       In a medium bowl, combine the sugars, flour, cocoa, baking powder, baking soda, cinnamon, and salt.
       In a separate bowl, whip together coconut oil, pumpkin, coconut milk, vinegar, and vanilla.  
      Then slowly add the liquid to the dry ingredients, stirring until  both mixtures are fully combined.  Next, fold in the chocolate chips.
       Add hot water to the batter and mix well, until the batter is thin.  Pour evenly into the prepared muffin tins and bake for about 18 - 20 minutes or until a toothpick comes out clean.
   Once the cupcakes have finished baking, allow to cool before coring and filling with the marshmallow fluff.
 
Vanilla Marshmallow Fluff

2 ½ cups powdered sugar


4 tsp vanilla extract


       To begin, use an electric mixer in a medium bowl and beat the palm shortening until light and fluffy.  Add in one cup of powdered sugar then whip until it is thick and hard to whip.  Then add in two teaspoons of vanilla and about half a tablespoon of coconut milk and mix.  Mix in another half cup of powdered sugar.

       Spray a glass cereal bowl with cooking spray and place five vegan marshmallows in the bowl.  Heat in the microwave for about 20 seconds.  Remove the bowl, stir, then mix in about one tablespoon of coconut milk.  Stick it back in the microwave for another 18-20 seconds.  Take out of the microwave and continue to stir, stir, stir. 

       Quickly fold the melted marshmallows into the frosting mixture.  Add the last cup of powdered sugar followed by a splash of coconut milk and the remaining two teaspoons of vanilla.  You now have a scrumptious VEGAN marshmallow fluff frosting!

Monday, December 15, 2014

Gluten-Free Almond JOY! Cake

       Sometimes you feel like a nut and sometimes you don’t!  In my case I do feel just a bit nutty. ;) 

       So today I bring you my version of a classic candy bar: Almond Joy.  Except it is in cake form!  If you like almonds, coconut, and chocolate, than I believe this will be THE cake for you!       

You'll need:


2 cup sugar

1 tbsp vanilla extract


4 eggs


1 ½ tsp xanthan gum

1 tsp baking powder

1 tsp baking soda

1 tsp salt

1 cup buttermilk


       Preheat the oven to 350°F.  Prepare two round 9” pans by greasing and flouring with gluten-free flour.
       In a medium bowl using an electric mixer, cream the coconut oil and sugar until light and fluffy.  Add in the extracts then continue whipping until fully creamed.
       Gradually add the eggs, one at a time, mixing well between each addition.  
 
    In a separate bowl, combine the dry ingredients.  Then stir that into the creamed mixture a little at a time, alternating with the buttermilk. Fold in Sliced almonds and coconut shreds.

       Pour batter into prepared pans then bake for 20 - 25 minutes or until a toothpick comes out clean from the center and the tops are a light golden brown.  Allow to cool fully before frosting. 

Best Chocolate Frosting Ever!
3 cups powdered sugar

¼ cup dark cocoa


1 tsp vanilla extract

Heavy whipping cream

       In a large bowl, whip the butter with an electric mixer until fluffy.  Next, whip in one cup of powdered sugar, then add in the cocoa, flavorings and one tablespoon heavy cream.  Keep whipping until the mixture becomes a little thinner.  Then whip in the remaining two cups of powdered sugar one at a time, beating well between each addition and alternating with the additional heavy cream as needed. 

       Spread the frosting over the bottom layer of cake for the filling, then place the second cake on top.  Finish frosting the top and sides of the cake with the rest of the frosting. 

Friday, December 12, 2014

Cinnamon Cranberry Scone


    One of my first recipes I posted on my blog was a Lavender Scone with a Spearmint Clotted Cream, which was a hit with my test group I might add ;). But now that we’re in that cranberry weather season I decided to switch up the flavors and bring you a Cranberry Spice Scone with a Cinnamon Glaze topping. I hope you enjoy!! 

What you’ll need... 

1/3 Cup Sugar 

2 Cups Flour 

2 tsp Baking Powder 

1/2 tsp Salt 

1 tsp Cinnamon 

1 tsp Nutmeg 

6 tbsp Butter, softened 


1/2 Cup Milk 

1 Egg 

Preheat oven to 425 degrees.  Prepare a cookie sheet by lightly greasing it.
 In a mixing bowl, combine sugar, flour, baking powder, and salt.  Mix well.  Cut in butter until fully combined and the mixture is crumbly.
Add in Cranberry, milk, and egg Mix thoroughly until batter is moist and slightly tacky.
  Drop spoonfuls onto greased cookie sheet, sprinkle with sugar.  This is optional, but it does give the top a wee bit of a crunch which adds a nice texture.

  Bake for 10-13 minutes or until the tops are a beautiful golden brown.

 Transfer onto a cooling rack and allow to cool slightly before serving.

Cinnamon Glaze


2 tsp Cinnamon

1 tsp Vanilla Extract

¼ Cup + 1 tbsp Whipping Cream
    In a bowl stir all the ingredients together until fully combined and thick. Dollop on top of each of the cooled scones generously. Put into the refrigerator so the glaze hardens. Serve and enjoy!

Tuesday, December 9, 2014

Gluten-Free Holiday Spice Cake


       I promised I’d be bringing more eggnog recipes to the table but I wanted to mix it up and have different variations of flavors featuring eggnog.  So this time I decided to bring to you one of my all-time favorite cakes: Spice Cake!  I love it so much that it is what I request every year for my birthday (though this year I made myself Baklava, which was also pretty amazing).
 I hope you enjoy this twisted eggnog spice cake recipe!
You'll need:
½ cup butter, softened
1 cup sugar
2 egg
1 tbsp vanilla
-
1 tsp baking soda
1 tsp baking powder
2 tsp nutmeg
1 ½ tsp clove
½ tsp cayenne
½ tsp salt
1 cup eggnog
1 tbsp vinegar

       Preheat oven to 350°F.  Grease two 9" round cake pans and set aside.
       In a large mixing bowl using an electric mixer, cream together butter and sugar until light and fluffy.  Next, beat in the eggs one at a time, then whip in the vanilla extract.
 
       Add one tablespoon of vinegar to the cup of eggnog, then set aside until needed. 
In a separate bowl, combine the flour, xanthan gum, baking powder, baking soda, salt and spices. 

       Gradually add the dry ingredients into the creamed mixture, alternating with the eggnog and beating well after each addition. You may need to hand mix the batter after the second addition of flour since the batter will become thick and gummy.

       Divide batter between the two prepared pans.  Bake at 350° for 20-25 minutes or until a toothpick inserted near the center comes out clean.

        Cool for 10 minutes before transferring from the pans to a wire cooling rack to let them finish cooling.
 
Salted Chocolate Butter Cream Frosting

1 stick of butter, softened

3 cups powdered sugar

½ tbsp dark cocoa

1 tsp vanilla


2 1/2 tbsp heavy whipping cream

       In a large bowl with an electric mixer, whip the butter until fluffy.  Whip in one cup of powdered sugar, then add in the cocoa, flavorings and one tablespoon heavy cream.  Keep whipping until the mixture becomes a little thinner.  Then whip in the remaining two cups of powdered sugar one at a time, beating well between each addition and alternating with the remaining heavy cream.   

       Spread the frosting over the bottom layer of cake for the filling, then place the second cake on top.  Finish frosting the top and sides of the cake with the rest of the frosting.  Sprinkle the top of the cake with a light dusting of nutmeg then serve and enjoy!