

Wednesday, July 30, 2014
Who's Behind the Apron?
I’ve
had several people ask me recently who’s behind Delectably Different Kitchen….Well
here I am and if you click (here) you can learn a little more about me!
I truly
appreciate all the support everyone has shown for all my recipes and creations.
I hope you can keep enjoying.
Monday, July 28, 2014
Coconut Sugar Peach Pastry

What you'll need for the Pastry:
¼ oz (1 Packet) Yeast
1
tsp Salt
½
Cup Warm Water
¼
Cup + 1/2 tsp Coconut Sugar
1
Large Egg
4
Cups Flour
½
Cup Milk, scalded
1
tsp Almond Extract
1/3
Coconut Oil, melted
1
tsp Vanilla Extract
1 tsp Cinnamon
In a small bowl, dissolve yeast in warm
water (no hotter than 110 degrees). Add
½ teaspoon of coconut sugar to the yeast. Set aside until the mixture becomes foamy and
expands to almost double the original size.
This should take about 10-15 minutes.
In a saucepan on medium-low heat, stir
milk constantly until small bubbles start to form along the sides of the pan,
but don’t allow mixture to boil. Remove
from heat.

I
did have to add about an extra ¼ cup flour at the end to compensate for the
extra stickiness that had formed.
Soooo,
the moral of this story is to always double-check that you have included every
ingredient before moving onto the next step!
Add in two cups of flour to the milk mixture and
continue mixing until it has a smooth texture. Pour the yeast into the dough and mix until fully
combined. Add the remaining flour and
mix until the dough is easy to handle. Knead
dough for 5 to 10 minutes to be sure that the flour is completely mixed in.


3
Cups Diced Fresh Peaches
2
tsp Coconut Sugar
1
tsp Xylitol
1
tbsp Whipping Cream
½
tsp Salt
½
tsp Cinnamon
1
tsp Almond Extract
1
tsp Maple Syrup
½
Cup Sliced Toasted Almonds
Peel and dice peaches until they measure
three cups (this should take about 3 -4 large peaches). Place in a saucepan with coconut sugar,
xylitol, heavy cream, almond extract, salt, maple syrup, and cinnamon. Let the ingredients simmer over low heat to allow
the flavors to combine.

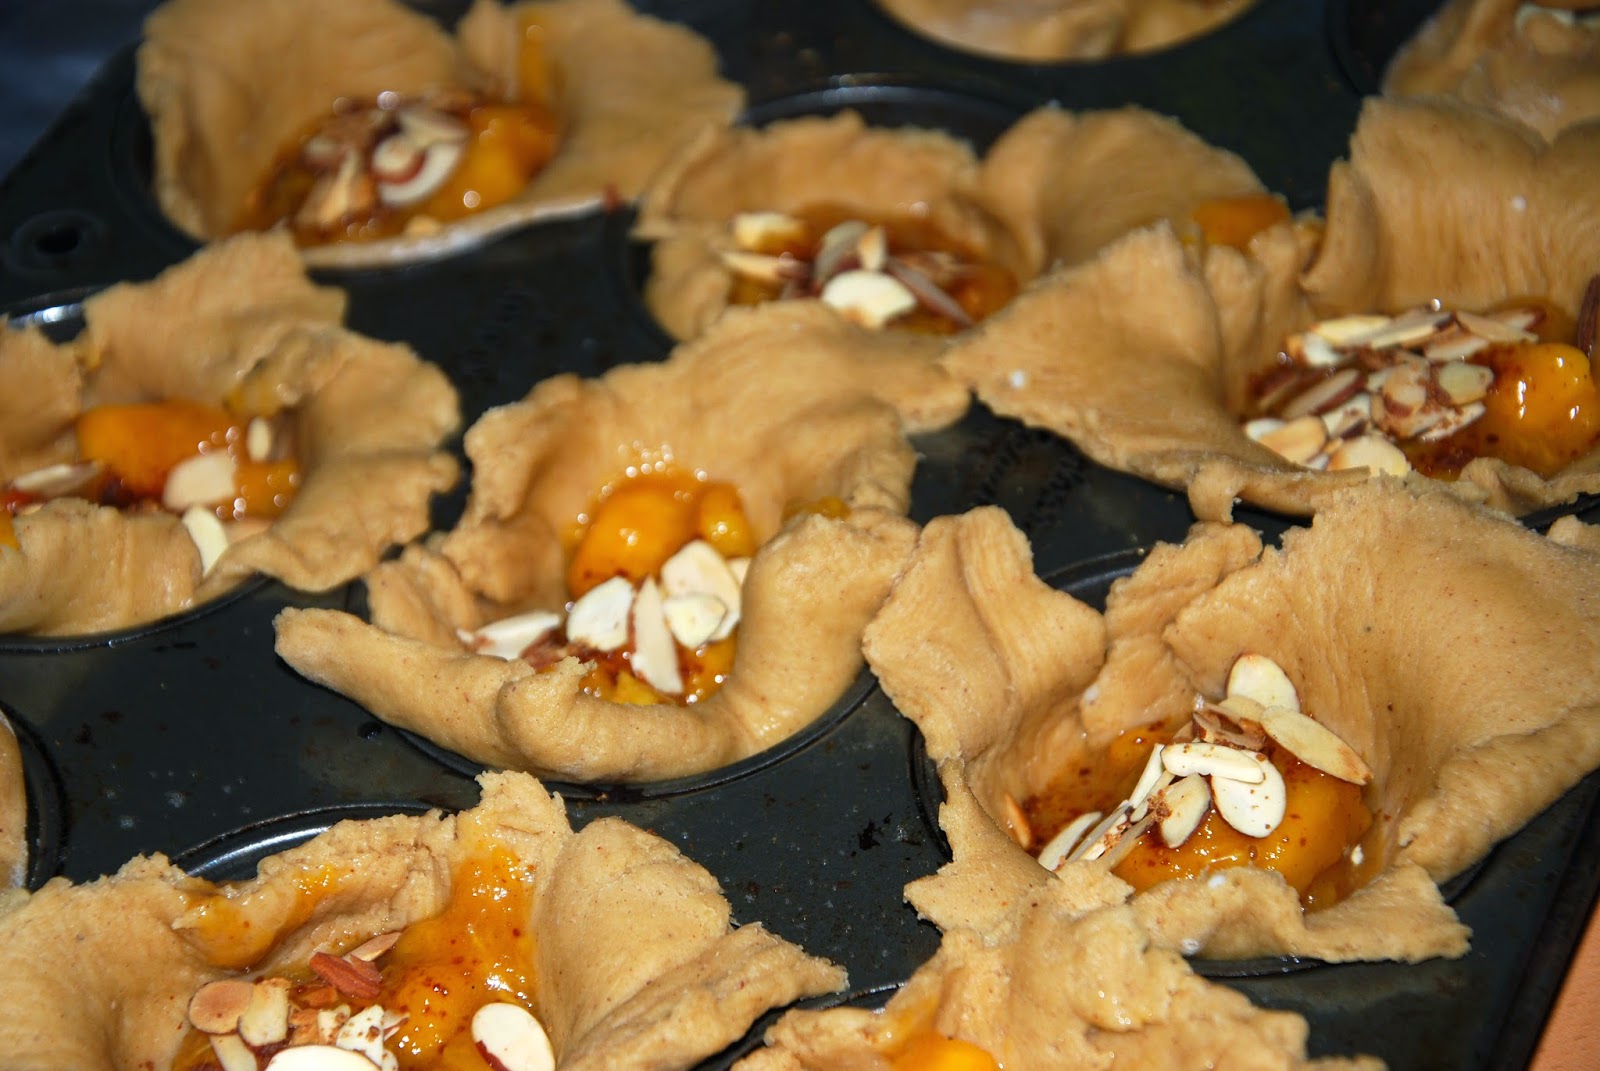
While the
pastries are still warm, top them with some cream or ice cream and enjoy!
Friday, July 25, 2014
Berries N’ Cream Cupcakes

So, um, I would like to start this recipe
out with a tip. This is an, ahem, especially
helpful point to remember for all of you food bloggers out there.
Plan A: When photographing step-by-step
pictures as you are making your recipe, make sure that you have enough battery
power to actually get a photo of the finished product as well.
Plan B: And while you're at it, don't
forget to charge your backup battery in case you forgot to enact Plan A.
You'll
need:
½
cup unsalted butter, softened
1
cup sugar
1
tsp vanilla extract
1
tsp butter flavor
2
eggs
1
1/2 cups cake flour, sifted
1/2
tbs baking powder
1/2
tsp salt
1/2
cup milk
Makes
12 Muffins
Preheat the oven to 350°F.
Line a muffin tin with paper cupcake liners.

In a medium bowl using an electric mixer, cream the butter until light and fluffy. Add in the sugar and extracts then continue whipping until fully creamed.
Gradually add the eggs one at a time and mix well between each addition.


Once
your cupcakes have cooled, it’s time to core out the center. Don't worry, with the proper tool this task is much
easier than you might think!


If you
don’t have a coring tool then I would suggest using a butter knife to cut out a
circle about the size of a quarter in the center of the cupcake, going down
about 1 1/2" deep.

Berry Cream Butter Cream
1
cup butter, softened
3
cups powdered sugar
1
½ tbs heavy cream
1
tsp vanilla extract
12
blackberries, diced (or berry of your choice)
In a medium bowl, cream the butter until
light and fluffy. Next, add in the
powdered sugar one cup at a time, blending well between each addition. Add in heavy cream, vanilla, and berries then
continue to whip until everything is fully combined.

Serve and enjoy! (And take a picture before you eat them all.)
Wednesday, July 23, 2014

Monday, July 21, 2014
Berry N’ Honey Cupcakes

½
cup Coconut Oil
3/4
cup Xylitol
1
tsp Vanilla Extract
1
tsp Coconut Extract
2
Eggs
1
1/2 cups Cake Flour, sifted
1/2
tbs Baking Powder
1/2
tsp Salt
1/2
cup Coconut Milk
Makes
12 cupcakes
Preheat the oven to 350°F.
Line a muffin tin with cupcake wrappers.


Next, add in the
coconut extract and eggs. Mix until
fully combined.

Bake
for about 20 - 25 minutes or until firm in the center and a tooth pick comes
out clean.

For this topping, you can use your
favorite berry! I used organic,
locally-grown blackberries when I made them and it was delicious. But blueberries, raspberries, strawberries,
or even cranberries would be a great option as well. Get creative and experiment to find what you
like best!
½
cup Honey
12
Berries, roughly chopped
In a small bowl, briskly whisk together
the honey and berries.

Friday, July 18, 2014
Piña Colada Cake

Earlier this week I posted a recipe for a
delicious, gluten-free Tropical Coconut Cream Cake. Let's continue with that theme and start
the weekend out right with a little slice of tropical heaven: Piña Colada Cake
with a Pineapple Rum Frosting. It's like
a party in your mouth!
Leave us a
comment and let us know what you think.
1 Cup Softened Butter
1 ¾ Cup Sugar
1 Cup Coconut Cream*
4 Eggs
1 Cup Buttermilk
1 tbsp Pineapple Juice
2 tsp Coconut Extract
2 ½ Cups Flour
1 tsp Baking Powder
½ tsp Baking Soda
1 tsp Salt, divided
2/3 Cup Unsweetened Shredded Coconut
*Here is a simple and effective way to get the coconut cream. With this method, you will need to have a can of coconut milk that has been refrigerated for at least 24 hours.
I personally like to use the Thai brand coconut milk when I'm
needing a thick cream for a recipe.


Step 3. Next
you'll need to drain off the watery part of the coconut milk that is on top of
the coconut cream. I recommend using the
coconut milk in a smoothie because it gives it such a good taste. But there are many ways you can use the
coconut milk, just don't waste it! Be
creative!


This is an easy and useful technique
to use the next time you are making a recipe that calls for coconut cream!
Preheat oven to 350°F.
Grease and flour two 9" round pans.

Separate the eggs into two medium mixing bowls. Set aside the egg whites.


Next, add the
dry ingredients alternately with the liquids to the coconut cream mixture using
a mixer on low speed.


Pineapple Rum Butter
Cream Frosting
1
Cup Softened Butter
3
Cups Powdered Sugar
1
Cup Powdered Xylitol
1
tsp Vanilla Extract
1
tsp Rum Flavor
1
tsp Salt
2
tbs Pineapple Juice
1/2
Cup Unsweetened Shredded Coconut (optional)
Cream
butter until smooth and fluffy. Whip in
powdered sugar one cup at a time, beating well between each addition. Next add in pineapple juice and whip until
fully incorporated. Then add powdered
xylitol and the extracts and continue beating until all the ingredients are
fully combined.

Frost the cake and garnish with about a ½ cup
of shredded coconut, if desired. Serve
and enjoy!
Wednesday, July 16, 2014
Real Men Bake
I
found this shirt online today and as a man who bakes I believe this motto to be
true. REAL MEN BAKE!

Monday, July 14, 2014
Gluten-Free Tropical Coconut Cream Cake
 Summertime means
relaxing on the beach with your toes in the sand and an ocean breeze blowing
your hair. It also means we tend to
crave those bright, tropical flavors that make summer, well...so summery.
So today I have for you a gluten-free and sugar-free coconut cake. Enjoy the refreshing and exotic flavors as
they transport you to a beachside vacation...sunscreen is optional.
Summertime means
relaxing on the beach with your toes in the sand and an ocean breeze blowing
your hair. It also means we tend to
crave those bright, tropical flavors that make summer, well...so summery.
So today I have for you a gluten-free and sugar-free coconut cake. Enjoy the refreshing and exotic flavors as
they transport you to a beachside vacation...sunscreen is optional.
8 Eggs
2 tsp Cream of Tartar
1/2 Cup Coconut Oil
6 tbsp Honey
1/2 Cup Coconut Flour
1 tsp Vanilla Extract
2 tsp Cream of Tartar
1/2 Cup Coconut Oil
6 tbsp Honey
1/2 Cup Coconut Flour
1 tsp Vanilla Extract
1 tsp Coconut Extract
2 tsp Orange Extract
2 tbsp Coconut Shreds
1/2 tsp Baking Soda
1/4 tsp Himalayan Salt
1/2 tsp Baking Soda
1/4 tsp Himalayan Salt
Preheat oven to 350°F. Grease one round 9 inch pan.

Separate eggs, putting all the yolks in a small bowl and all the egg whites in a large bowl. To the egg whites, add the cream of tartar then whip together until stiff peaks form.

In a separate bowl, cream together honey and coconut oil. Then add the egg yolks to the creamed mixture and mix well.

To the creamed ingredients, add the
coconut flour, extracts, baking soda, and salt.Mix until fully combined.
 Gently fold the batter a little at a time into
the egg whites. Continue this process until they are completely mixed together.
Gently fold the batter a little at a time into
the egg whites. Continue this process until they are completely mixed together.
Pour the mixture into the prepared cake pan.
Bake for 20 minutes or until a toothpick comes out clean.
Coconut Chunk
Whipped Frosting
1 Cup Whipping Cream
½ Cup CoconutButter or Manna
1 Cup
Powdered Xylitol


Subscribe to:
Comments (Atom)